One of the more iconic features of a Black Templar army are their helmets. I couldn't find a specific name for them, so let's call them crusader helmets. Here's one!
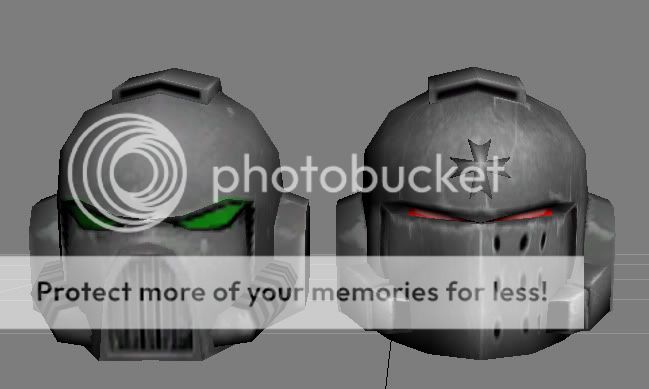
Here's what I mean. A default helmet is to the left, and a crusader helmet to the right:
It's very much like a Grey Knight helmet, but without the excessive underbite that Grey Templar helmets have.
The Black Templars conversion kit comes with a few helmets like this, but they're not cheap on bits stores. Similarly, Forgeworld offers some (look at 30k Imperial Fists), but it's not cheap. So convert your own! It's basically free and looks great. It's not that much work either.
It's a pretty simple conversion. All you need is a normal helmet, some milliput, and some delicate files. I don't think green stuff would work as well as milliput because it's not as sandable, but I didn't try.
The steps are straightforward. Take a default helmet:
First cut the helmet's mouth grill off. The best way to cut that I found is to make a vertical cut that goes as deep into their face as possible; typically just until you touch any hoses or other detail that goes along their jawline. Then grind their cheekbones down a bit, because after this cut, there'll be a bit of a protrusion just under their eyes that used to follow the curve touching their mouth grill. That curve will be gone. You can see traces of sanding on the second and fourth pic below:
Finally, use some milliput. Try to just follow the curve of their cheeks and end up in a straight line down the middle of their face. I try to keep the upper edge of the extension flat. I curve their chin a bit, initially accidentally but the look worked. I suggest using clay shapers to achieve straight surfaces and blend the extension into their cheeks. That's hard to see on this guy considering his face already has a lot of detail, but the more plain helmets really benefit from clay shapers.
You may engrave something over the extension as it dries. I added some holes on a few, and I'd like to try making vertical grills on a few as well.
Finally, when it's dry, sand it smooth. These pics were taken before that step, sorry.
But that's it! Pretty easy. Now to do this for every single one of them...


No comments:
Post a Comment