Epic stories about removing mold lines and destroying brushes with poor technique.
Thursday, February 26, 2015
Sunday, February 22, 2015
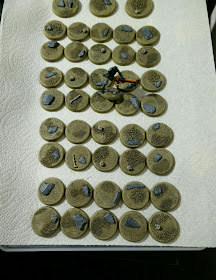
More Bases Done!
I finally got my 32mm bases, and with a few 40mm bases, started working on them. This was so boring to do, but they look great, and I won't have to paint 32mms for a while now.
I experimented with using multiple sizes of rocks. I think I went to coarse on these, but once painted and with a miniature on top, I hope it will not be as noticeable. Otherwise is it the same method I used for my other bases before.
I experimented with using multiple sizes of rocks. I think I went to coarse on these, but once painted and with a miniature on top, I hope it will not be as noticeable. Otherwise is it the same method I used for my other bases before.
Wraith Magnetization pt. 3: Vengeance
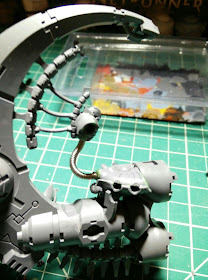
While assembling my third Wraith, I realized that I don't want the body to be glued to the tail. It would be so much easier to just magnetize there. I also have a pile of 5x2mm magnets I barely got to use.
It is straightforward to do this:
The joint is very strong, more than strong enough to hold the body, and to lift the tail firmly when moving the model. The joint is very strong, the model doesn't wobble or rotate. I think smaller magnets might have done just fine too. Anyway, I'm feeling good about this, it will make transport far easier.
Monday, February 16, 2015
Wraith Magnetization pt. 2: The Reckoning
I changed my mind about not magnetizing guns on Wraiths. Magnetization is fun. The fact that I'd have to modify (ruin?) their bellies really changes very little as you don't see it unless you pick up the model. Not during gameplay.
Once again I used only 2x1mm magnets:
Once again I used only 2x1mm magnets:
Sunday, February 15, 2015
Wraith Magnetization
Wraiths come in three variants: plain, with either of two guns mounted on it's belly (left and center models) or with Whip Coils (right model). Of those, the guns are fairly useless. They're expensive, they do not synergize well with the melee assault role Wraiths are great at, and they get in the way of using Whip Coils that are excellent.
As such I decided to not even mount the guns on my models. Magnetizing them would take significant effort and would alter the detail on their bellies. Also, switching between the two gun types would require magnetizing the weapons themselves in addition to their mount to the wraith. I can deal with this many components to be magnetized, but I really don't want to change the detail on their bellies.
I could have put a large magnet on the inside of the belly to keep the detail pristine, but this still leaves the problem of putting magnets on the gun mount side. The arms of the gun mount are very thin, too thin for even the smallest magnets I have. There must be a way to accomplish this if I were to try harder, but I just don't think it's worth it. Besides, the arms of the gun mount hold their own weight without magnets on the one Wraith I assembled so far. Maybe that would be enough if I someday decide to try using those guns.
So that only leaves magnetizing Whip Coils. They cost extra points, can be purchased per model, and are only useful in melee contact. This means that people rarely get Whip Coils for all models. A few Wraiths might die from being shot at before they reach melee contact, so having a few unupgraded Wraiths that will die from shooting makes sense.
Anyway, to magnetize the Whip Coils and the short blades you can put in Wraiths front arms instead, I was inspired by youtuber zakcharnage:
And here are some pics:
Friday, February 13, 2015
Ghost/Doomsday Ark Painting
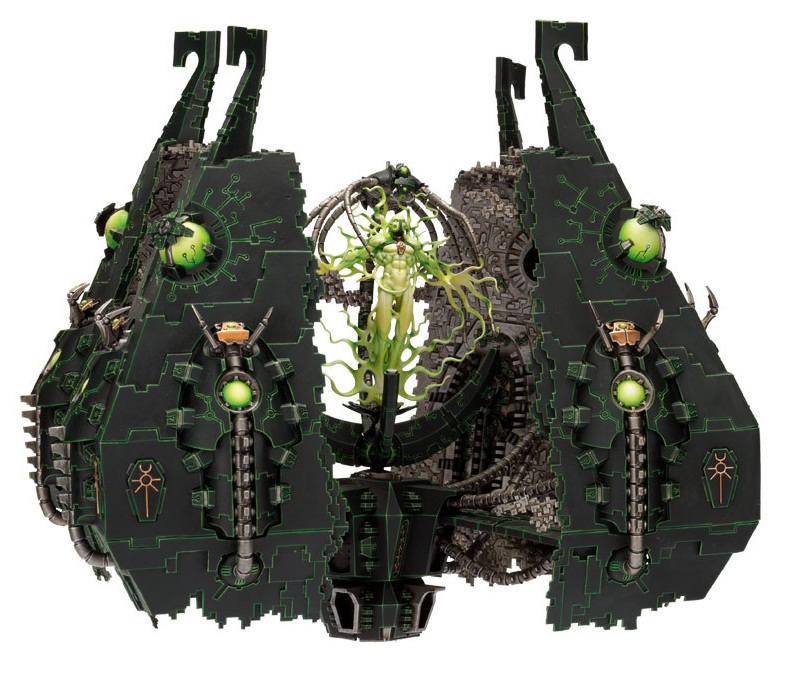
It took me weeks to complete this model. I'm very happy with how it turned out. On to pictures!
Here are a few progress pics:
And when the model was done:
Here are a few progress pics:
And when the model was done:
Wednesday, February 11, 2015
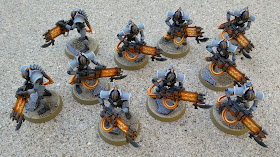
Immortal Conversion
There is not much to say here. Because I want to freehand lines on all Gauss weapons like I did with my Warriors, I changed the Immortal Gauss weaponry by removing the textured rods that Immortals have by default and replaced them with smooth rods I cut from these rods I got from Amazon. They have the same diameter as those green rods Necron Warriors come with.
Also, I just got liquid green stuff for the first time. I used it to fix their shoulder plates. How did I live without it?
Also, I just got liquid green stuff for the first time. I used it to fix their shoulder plates. How did I live without it?
Ghost/Doomsday Ark Conversion
The theme of my army, when it comes to vehicles, is that pilots/drivers should not have limbs, a human form, and instead be integrated with the vehicle directly. It's robotic, it's grimdark, it's foreign.
My approach to doing this is largely inspired by blogger fromthewarp and his Necron ark:
So it made a lot of sense to approach my Ark conversion similarly.
However, I tend to also remove the console (keyboard) that the pilot should have been operating with their hands, and I also remove legs. This was a problem with the Ark. Doing that would leave a huge gap in the model that is visible to the naked eye. In my Barge I just left the space open, in my Scythe I moved the pilot forward and added some pipes to mitigate the problem. Neither approach was possible with the Ark and I needed to add bits in place of where the legs and the console would be.
To make things worse, removing his butt and legs implied removing his chair. The recline part of the chair looks great and I wanted to keep it very hard, but I just couldn't. There was no way to attach it to the vehicle without getting in the way of the large spine pipe I had in mind for the model. I didn't end up using the chair.
After looking at different Necron models and bits I could find on Ebay for cheap. I was looking for something approximately 2cm by 2cm that I would where his feet would be in order to hide the emptiness below. It needed to look machine-y, ideally give me an opportunity to add some orange glow that would be missing when looking at the model from above. I found a solution in the Obelisk model, namely the bug that sits on top of the C'tan in the middle:
And, with that, the Ark was ready for painting!
My approach to doing this is largely inspired by blogger fromthewarp and his Necron ark:
So it made a lot of sense to approach my Ark conversion similarly.
However, I tend to also remove the console (keyboard) that the pilot should have been operating with their hands, and I also remove legs. This was a problem with the Ark. Doing that would leave a huge gap in the model that is visible to the naked eye. In my Barge I just left the space open, in my Scythe I moved the pilot forward and added some pipes to mitigate the problem. Neither approach was possible with the Ark and I needed to add bits in place of where the legs and the console would be.
To make things worse, removing his butt and legs implied removing his chair. The recline part of the chair looks great and I wanted to keep it very hard, but I just couldn't. There was no way to attach it to the vehicle without getting in the way of the large spine pipe I had in mind for the model. I didn't end up using the chair.
After looking at different Necron models and bits I could find on Ebay for cheap. I was looking for something approximately 2cm by 2cm that I would where his feet would be in order to hide the emptiness below. It needed to look machine-y, ideally give me an opportunity to add some orange glow that would be missing when looking at the model from above. I found a solution in the Obelisk model, namely the bug that sits on top of the C'tan in the middle:
I got just that bug, just the plates without the tentacles, for a few bucks on Ebay including shipping. When I received it and got a closer look I noticed that this bug has a very noticeable slant that wouldn't look good, so I flipped it upside down. It is slightly concave on the other side, but only slightly, I could make it work.
I was looking for a bit that would let me paint some glow, but this particular bit also gave me a perfect opportunity to tie all pipes connecting the pilot to the vehicle! I would just plug them where the tentacles would have been.
With all those pieces ready, the conversion was straightforward. I used three thicknesses of old bass guitar strings.
In addition to the pilot, I want paint all my Gauss weapons using the same freehand technique I used for my Warriors. The Gauss weapons that are on the side of the Ark have a textured rod that would prevent this, so I had to remove these textured rods and replace them with smooth rods of an appropriate diameter.
I found these rods on Amazon that are the same diameter as the green rods that come with Necron Warriors. They are the most cost efficient rods I found. Replacing the textured bits with these smooth rods was straightforward:
And, with that, the Ark was ready for painting!


